¶ Overview
This page serves as a guide on how to install Proxmox on your computer. Proxmox is an incredibly powerful hypervisor that can provide valuable services, such as virtualization, redundant storage, and clustering. Installing it is not too difficult and with this guide, you will be able to install it easily.
It is recommended to install Proxmox on bare metal. This means you shouldn't install it in a virtual machine. This is because Proxmox manages virtual machines of its own, and generally the bare metal operating system of choice for a Homelab.
¶ What You'll Need
For this, you will need:
- A USB flash drive (16-32GB recommended)
- Another Computer with internet access
- An open USB port on both your computer and the target computer
- An Ethernet connection on the target computer (optional)
¶ Getting the Operating System Image
In this section, you will download the OS image from the software's website.
- The Proxmox download page can be found here. Download the Proxmox VE ISO Installer.
The architecture to install for in 99% of cases will be amd64. The file should be a .iso file, and will be around 1.3 GB in space. It will most likely take a few minutes to download.
In this tutorial, we will be installing Proxmox VE 8.3. The installation may differ for other versions.
The file should look something like this:

¶ Flashing the Image
In this section, we will put the newly downloaded .iso image on the flash drive to make it bootable.
You will need extra software for this. The two most common programs for this are BalenaEtcher and Rufus. This tutorial will use BalenaEtcher due to its user-friendliness.
After you've downloaded BalenaEtcher, the software doesn't require any setup, and will show a screen similar to this:

If you haven't plugged in your USB drive by this point, do so now.
If you've downloaded the .iso file, you will hit the “Flash from File” button. It should default to your Downloads folder, but if not, navigate to your downloads folder. Choose the .iso file you've downloaded.
Next, hit “Select Target”, and choose your flash drive.
Finally, hit “Flash!”. This process will take some time. You do not have to install the other apps that are advertised.
Once the process is done, you can eject and remove the USB drive.
¶ Booting from the USB Drive
Once the USB drive has been removed from the system, you can plug it into any USB port on the target computer.
- If there is an available USB3 port (the blue variant), plug the drive into that.
Once the USB Drive is plugged in, plug in a keyboard and turn on the system.
You will need to spam/hold a key to get into the boot menu. this key can be different depending on the system. Generally, it will either be F2, F12, or Del.
- On a Dell system, the key is F12.
Once in the boot menu, select the USB drive, and the system should boot into the installer.

Credit: DELL
¶ Installing the Operating System
Before you proceed, make sure any sensitive info that you may want to keep is backed up, as this section will erase all of the data on the drive.
Once you boot into the installer, you will be met with this screen:
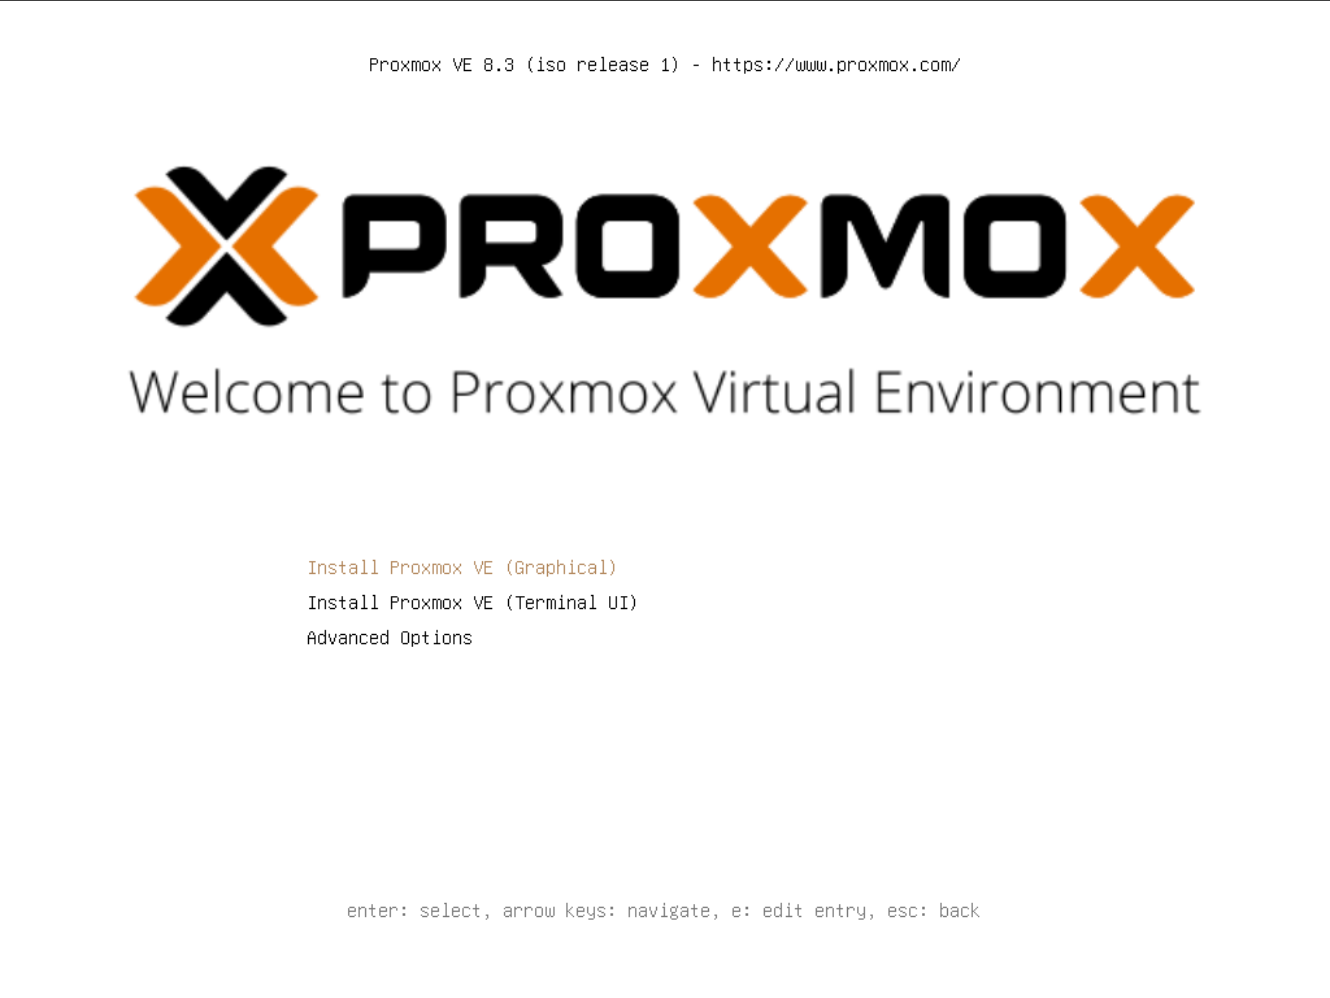
Choose “Install Proxmox VE (Graphical)”. This will load you into the Proxmox Installer.
Make sure to install to the correct disk if there is more than one.
Be sure your time zone is correct. It may be incorrect.
Next, it'll ask you for a password. This will be the password for the console and for the web UI. The username will default to root. The email will be used if something is wrong with your server in the future, so make sure you use one that you can access.
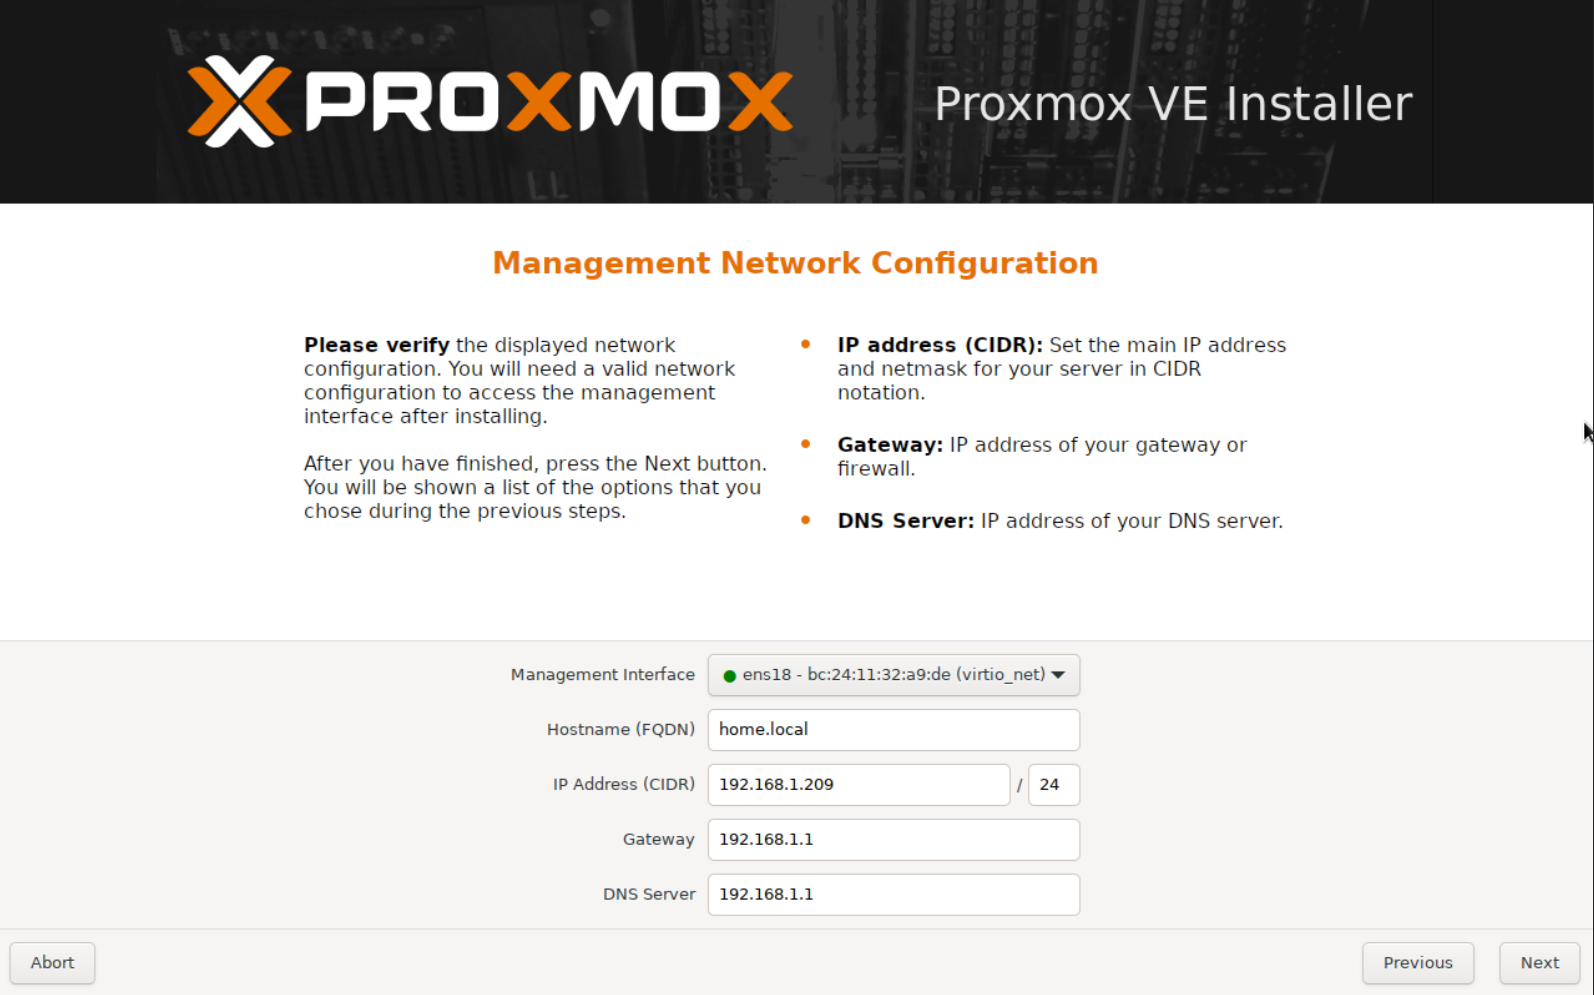
The next screen will ask about a network configuration. An Ethernet cable is very strongly recommended for Proxmox. The hostname requires a top level domain. Enter the hostname you want along with something like .local. If the system is connected to a network with a DHCP server, the fields on this screen will be autofilled. Unless you want a specific address, you don't have to change the IP address, Gateway, or DNS server.
Review your decisions, and click install. This process might take a few minutes.
After the system reboots, you will be put into the console. If you want to use the console, you can login using the password you set earlier. However, there is now a web UI available. Go to the IP address in your browser (make sure to include the :8006) and you can log into the web UI.
In this case, the IP would be https://192.168.1.209:8006.
Your browser may give you a security warning. Click advanced and continue to the site. Once there, use root as the username and the password you set earlier.
That's it! You have successfully installed Proxmox! Disregard the subscription notification, and explore what you can do!